Getting Started with Main Office
What is DSheet and DDX?
Daily Sheet, a.k.a DSheet, is a main office program that gathers all the Store Final Daily Sheet information from all your locations into a central database. The Daily Sheets are used mostly for accounting purposes so we normally refer to this program as the accounting reports. You can pull daily sheet totals for 1 or all locations in different formats to meet your business needs.
Data Exchange, a.ka. DDX, is the main office program responsible for gathering your Customer and Maker databases into a central location. You can manage your customer and maker data for all your locations in this single program. This means you can place memos and flags on customers and makers and those changes get pushed down to the stores.
DDX is also responsible for gathering CTR information , SAR information, and Money Order Logs for all of your locations. Details regarding any of these reports is stored in DDX Software.
How to Login
Locate the DSheet and DDX icons. Double Click to start the programs.
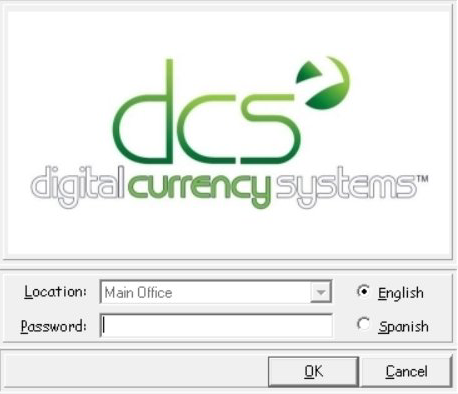
Type your password and click OK. The default password will be provided.
How to create a new user in the Main Office
*Note* Only existing Admin users can execute the steps below.
Step 1
Login to the Daily Sheet Program
Step 2
On the main set of icons, Select Setup > System Settings > Security Setup > User Setup.
Step 3
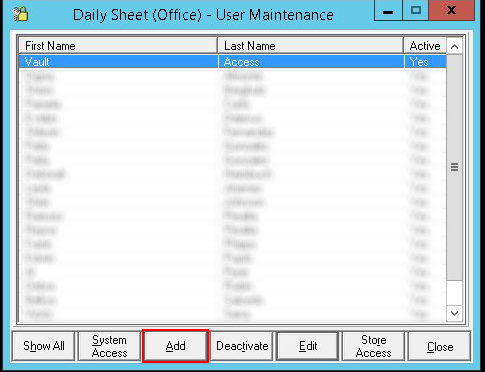
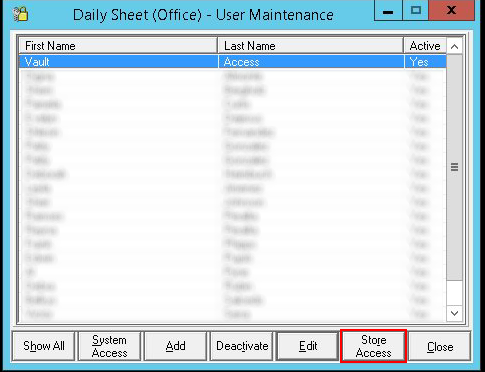
The existing list of users will be displayed. Click Add.
Step 4
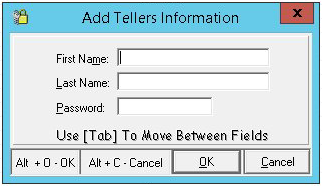
Type in the new user's information and choose a password.
Click OK to save. Now the user has been created. By Default, users don't have any stores assigned to them. The steps below show you how to assign stores.
Step 5
In the user screen, select the user and click Store Access on the bottom right.
Step 6
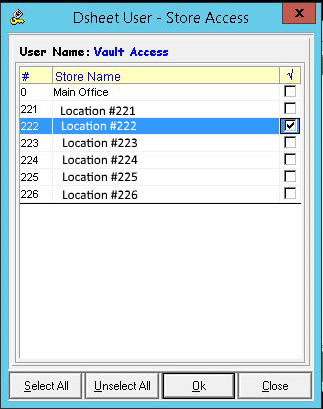
The list of active locations will be displayed. You can check each location the user need access to on the right OR choose the Select All on the bottom left.
Now the user is setup and can access the store data selected.
Return to Top
DDX Overview
This main office program is responsible for gathering your Customer and Maker databases into a central location. You can manage your customer and maker data for all your locations in this single program. This means you can place memos and flags on customers and makers and those changes get pushed down to the stores.
Customer Lookup
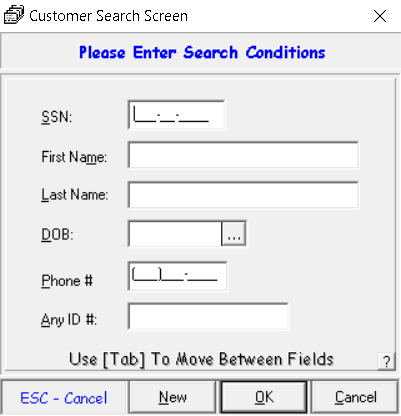
On the main menu click the Customers icon.
Use the search fields to look for the customer profile you need to access. You can use any of the fields to help with the search.
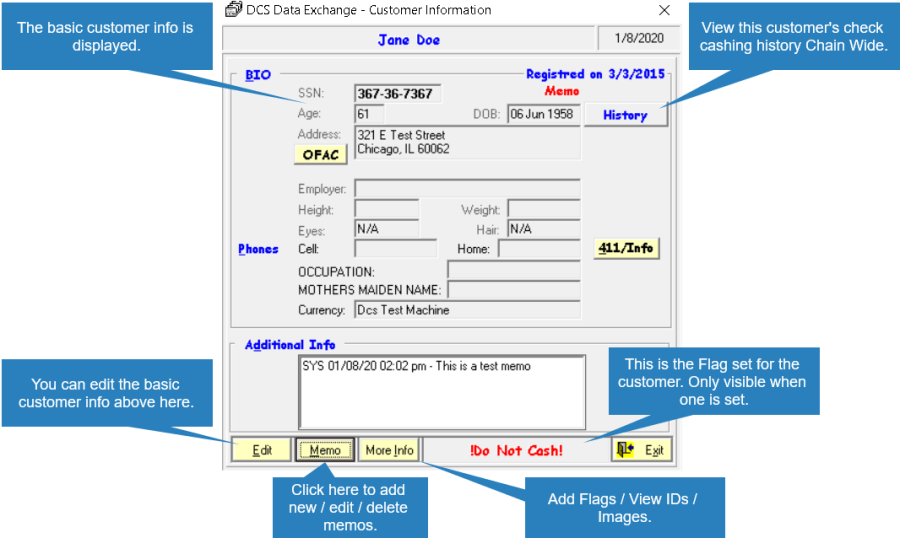
The customer profile contains all the customer information as well as check cashing history. Below you can see where each of the different things is displayed.
Some Key things you will want to do are to Add Memos and Assign Flags to customers. These 2 options are located on the bottom of the profile page.
Maker Lookup
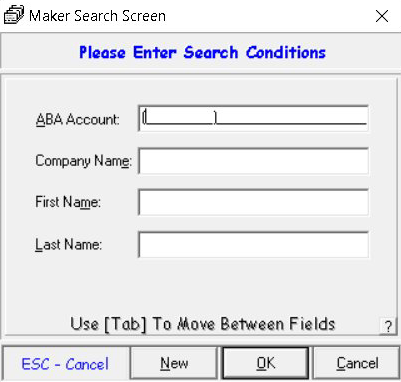
On the main menu, click the Lookup Maker icon.
Use the search screen to look for makers. The best option is the routing number and account number.
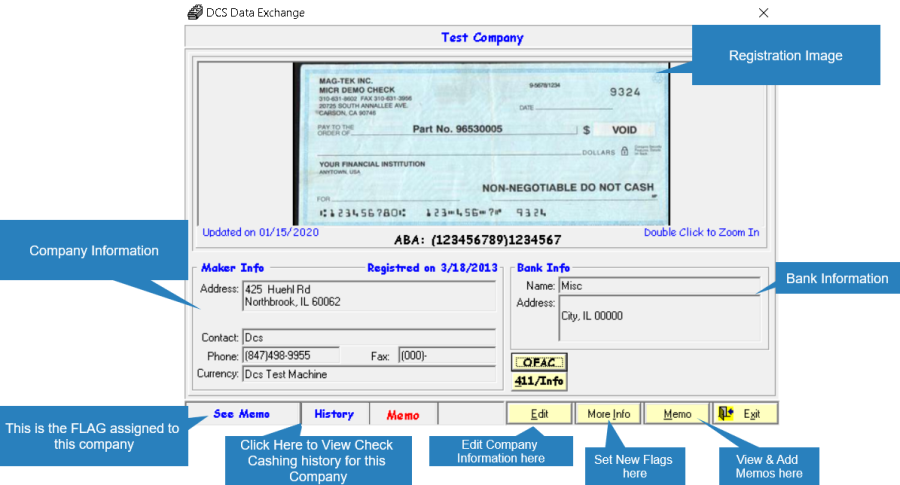
The maker profile contains all the information for each company. Adding Flags and Memos is probably the most important task and that can be accessed in the 'More info' tab. Check cashing history is also important and it can be accessed by click the 'History' link at the bottom left.
General info about Memo and flags being sent to all stores
We have 2 types of Flags in DCS:
- Blue Flag - Allows transactions to continue for the customer or maker
- Red Flag - Stops transactions for the customer or maker
Memos and Flags changed or set in the main office software will update all stores. The change is on a timer, it is not instant.
Stores can remove Red Flags at stores but it will NOT update all the stores. This is intended as protection in case a flag is removed by accident. The main office program is the only location that will update red flags to all locations as it is considered to be the highest level of authority.
Return to Top
Reports
Lookup New customer
This report is used to look at new customer registrations at the store level. Data can be used for new customer marketing campaigns. You can choose a date range to filter out the data and export it to excel.
Lookup New Makers
This report is used to lookup new makers registered at the store level. This can be used to audit duplicates and analyze how many new companies are being created. You can choose a date range and export the data to excel as well.
Flag Reports
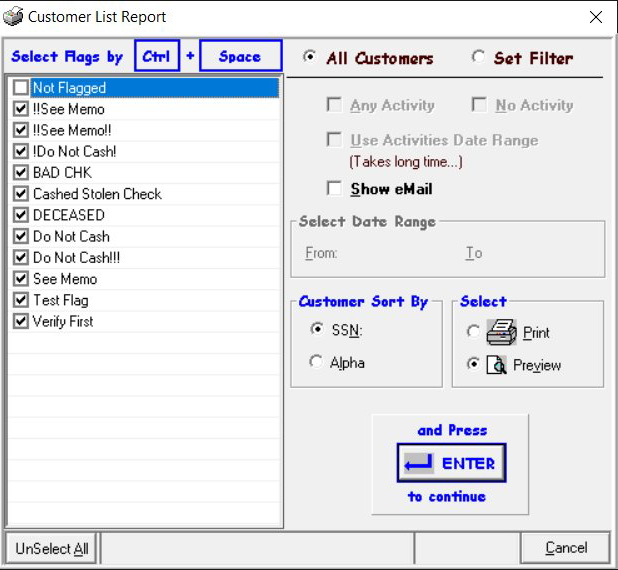
Flag reports are used to pull reports on customer or makers with Specific Flag designations. This will help you filter the data set for your organization and keep track of which customers or makers have specific flags set.
You can choose which flags you want to report on and if you want to filter the data base don activity.
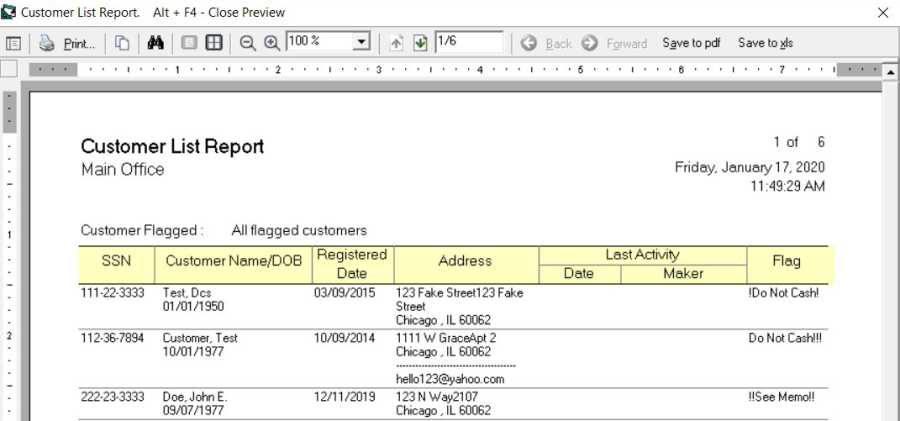
The report is displayed and you can print or export it to excel on the top right.
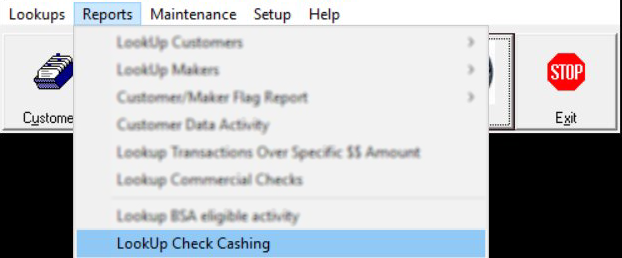
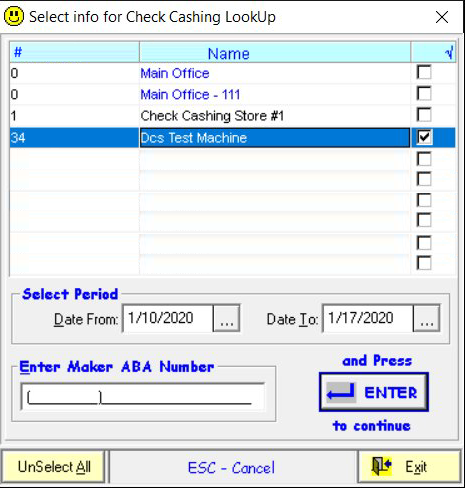
Lookup Check Cashing
Looking up the check cashing activity for any/all locations is available through this report.
Select the location(s) and a date range and press Enter.
The data will be displayed and you can export to excel.
Currency Transaction Report (CTR)
Federal law requires financial institutions to report currency (cash or coin) transactions over $10,000 conducted by, or on behalf of, one person, as well as multiple currency transactions that aggregate to be over $10,000 in a single day. These transactions are reported on Currency Transaction Reports (CTRs).
CTRs are aggregated in the DDX Software for reporting. The location(s) populate the required data at the time of the transaction. You can view that workflow here.
CTR Detail
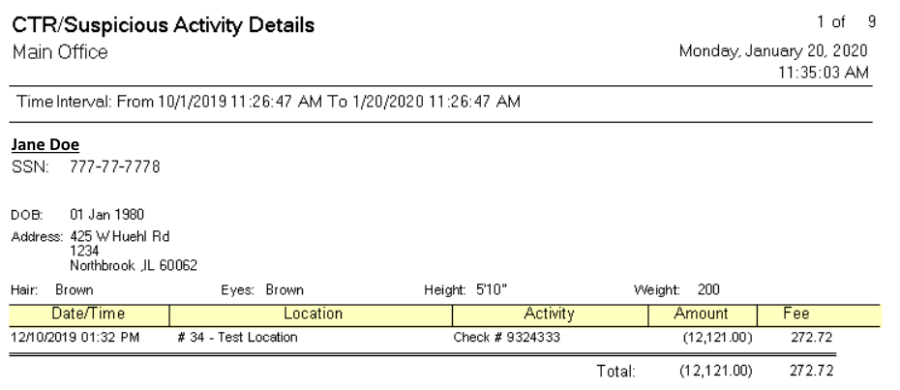
The CTR Detail report will list out each transaction/location that was involved in the CTR. The standard CTR Report is a summary which just displays Cash IN vs Cash OUT totals. We find this is the most useful report for day to day review of CTR transactions.
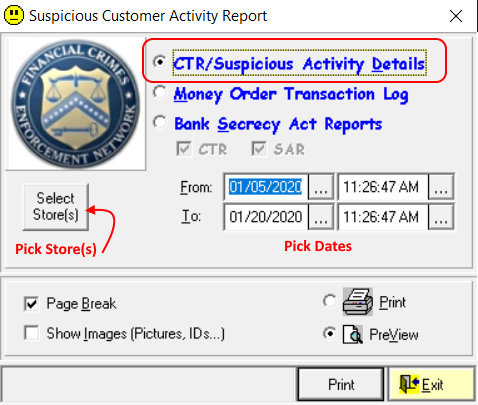
Start by clicking the CTR icon on the main screen.
The options below will appear. Select the TOP option which will display CTR details. You can also choose the locations you need and the date range for the report. Click print to start.
The reports will be displayed. 1 page per report. Below is an example of a CTR involving a check cashing transaction.
Return to Top
Suspicious Activity Report (SAR)
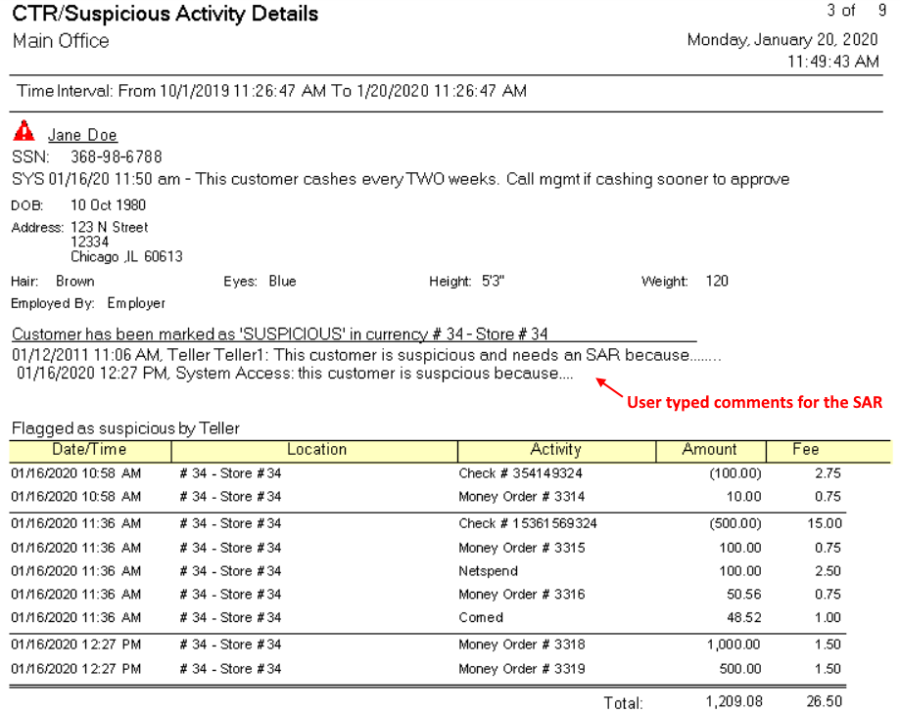
The Suspicious Activity Reports are also included in the report above. The will look slightly different. These are transactions that are flagged by the USER at the store level.
The RED TRIANGLE icon is the indicator for a SAR. The example below contains the customer information and the user typed comments as a description for flagging the transaction as 'Suspicious'.
Money Order Log
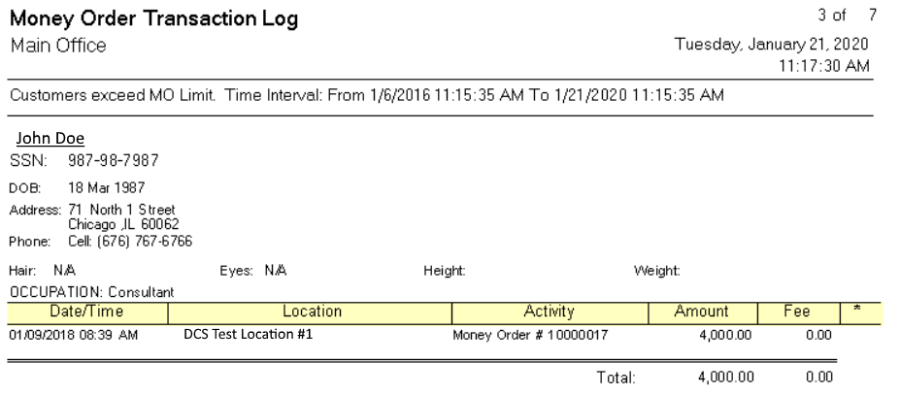
This is a configurable report based on amount for money orders printed through the DCS MOPS Software. The report will list out the money orders and the customer associated with the purchase.
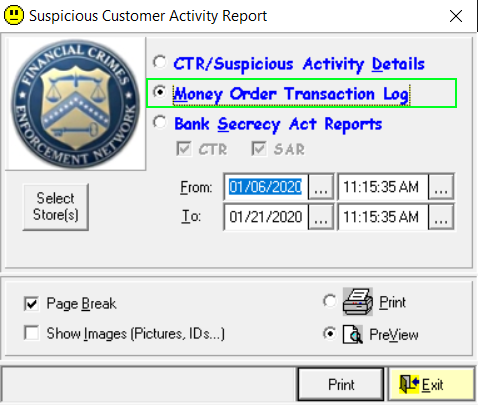
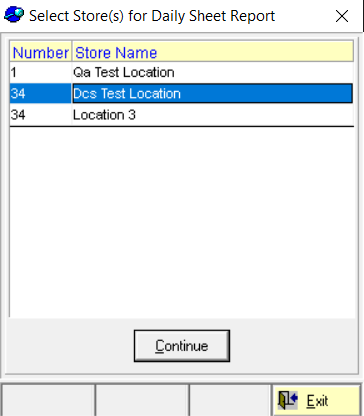
Select the Money Order Transaction Log option, locations, and a date range for the report.
The example report below displays the money order details and customer information.
Return to Top
Daily Sheet Overview
Daily Sheet, a.k.a DSheet, is a main office program that gathers all the Store Final Daily Sheet information from all your locations into a central database. The Daily Sheets are used mostly for accounting purposes so we normally refer to this program as the accounting reports. You can pull daily sheet totals for 1 or all locations in different formats to meet your business needs.
How to view a Daily Sheet
Click on Reports and Select Daily Sheet from the drop down.
Select a location.
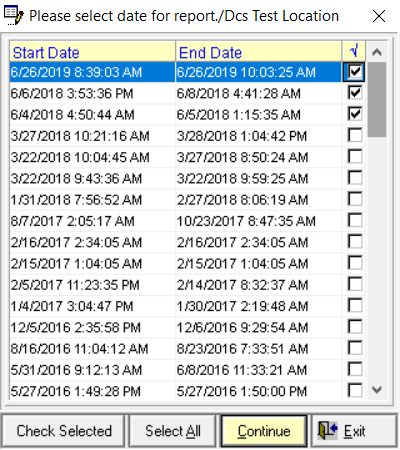
Choose the date(s) you want to view and Click Continue.
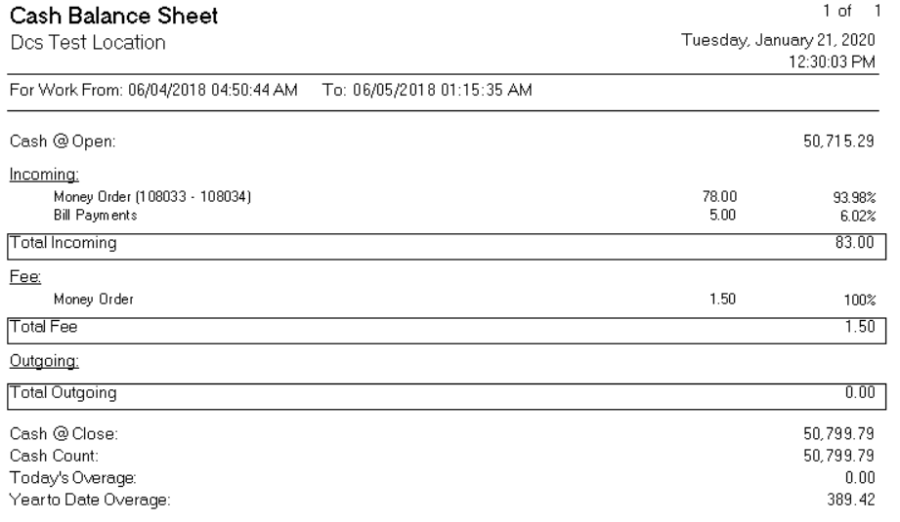
The Store Daily Sheet will be displayed. Each date will be a separate report. Close each one to continue.
How to Edit a Daily Sheet
The main office is able to modify any of the accounting figures for each of the Daily Sheets in the system. You can also Add and delete daily sheets as needed. Edit is the most used function. This will allow you to change category totals or add new totals in case the locations made a mistake during the business day.
To Edit, Select 'Daily Work' and then navigate to EDIT > Single D.S.
Select the location.
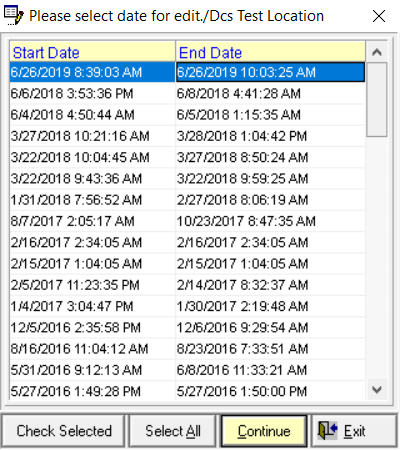
Select a date that you want to modify data for.
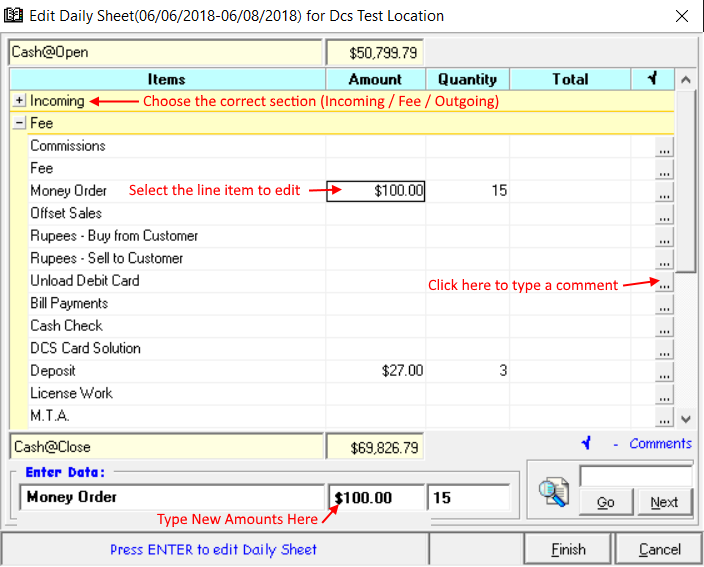
The edit screen will appear. The first step is to identify the correct line item to edit. There are 3 sections just like the Daily Sheet layout. Select the line item and you can type the amount or edit the amount on the bottom area. You can also type comments if needed by clicking the small icon on the right.
Once the adjustments have been made, click Finish.
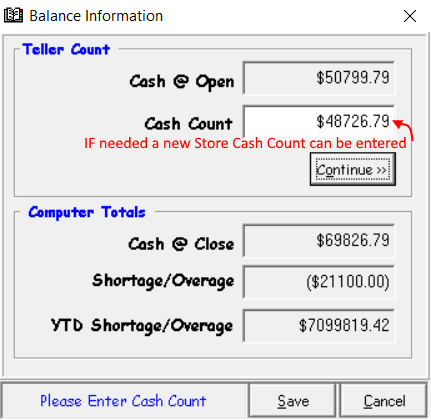
The system will display a cash count screen. This will re-calculate the balance based on the adjustments made to the data. You can also edit the Cash Count value if a mistake was made for that value as well. The Cash count represents each teller drawer total + the vault total.
Click Save and the system will ask you to propagate the changes to the next daily sheets. Click Yes so the balances are updated for the sheets after this one or NO to not change any values for the other sheets.
Return to Top
Monthly Daily Sheet
The Daily Sheet Program can automatically combine an entire month worth of Daily Sheets so you can get full totals in a quick report.
Go to Report > Monthly Daily Sheet
Select a location.
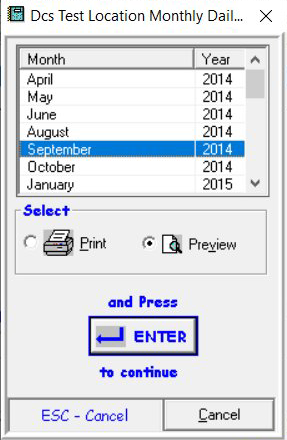
You have the ability to choose a Date Range OR a Month/Year.
Select a Month and Year. Click Enter to continue.
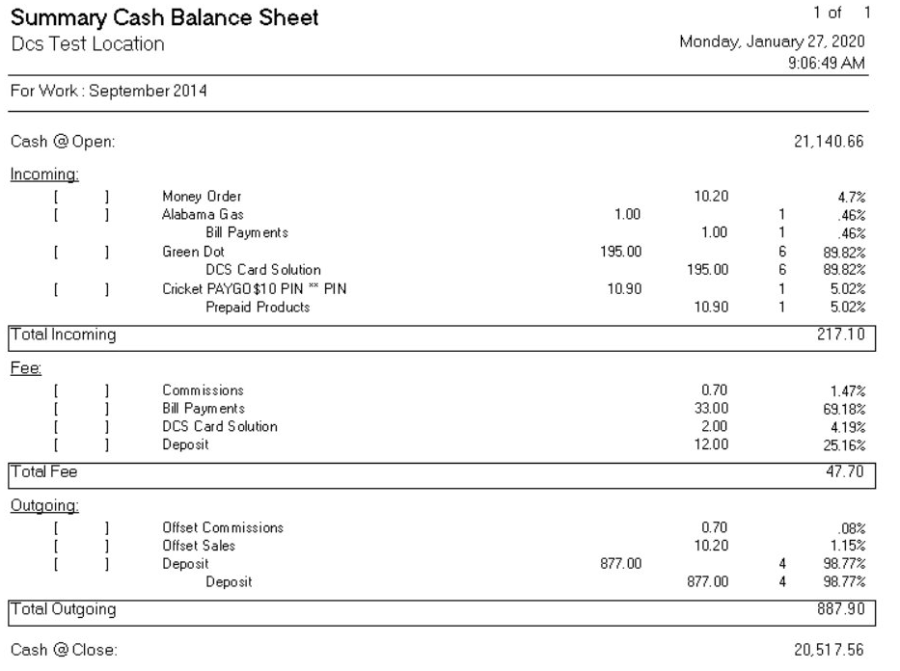
The Summary totals for the entire month will be displayed. The % values on the right are calculating what percentage each of the line item within each section. In the example below, the money order totals 4.7% of the total incoming section. This shows you which services/line items are most popular at a glance.
Return to Top
Consolidated Report
This is probably the most useful report in the Daily Sheet Program. It allows you to select multiple locations, date ranges, and any/all line items and combines their totals side by side.
Go to Reports > Daily Sheet - Consolidated.
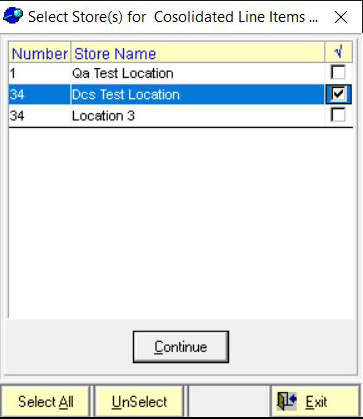
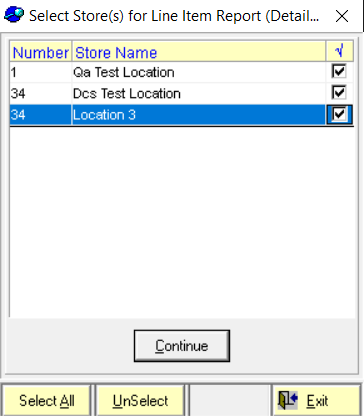
Select a location(s).
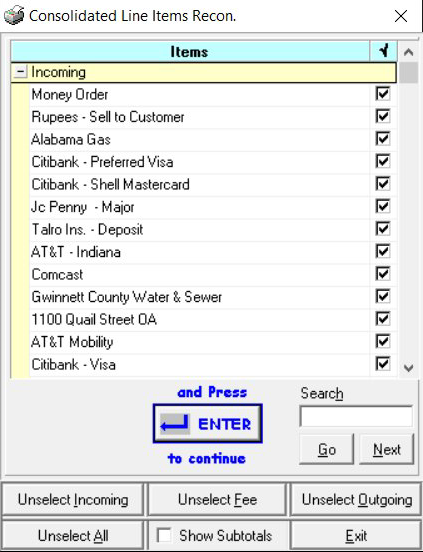
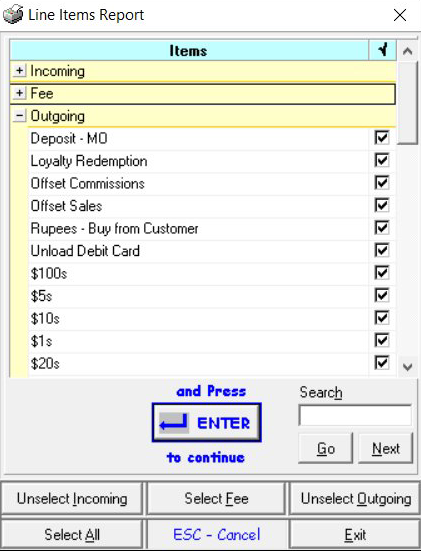
Select which line items you want to be part of the report. Shortcuts at the bottom allow you to quickly select everything in each section. Click Enter to continue.
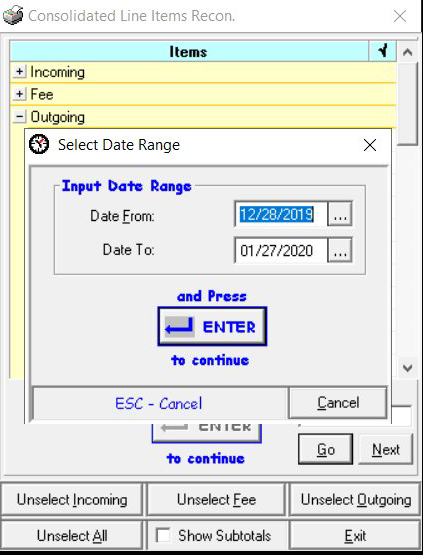
Select a Date Range. Click Enter to Continue.
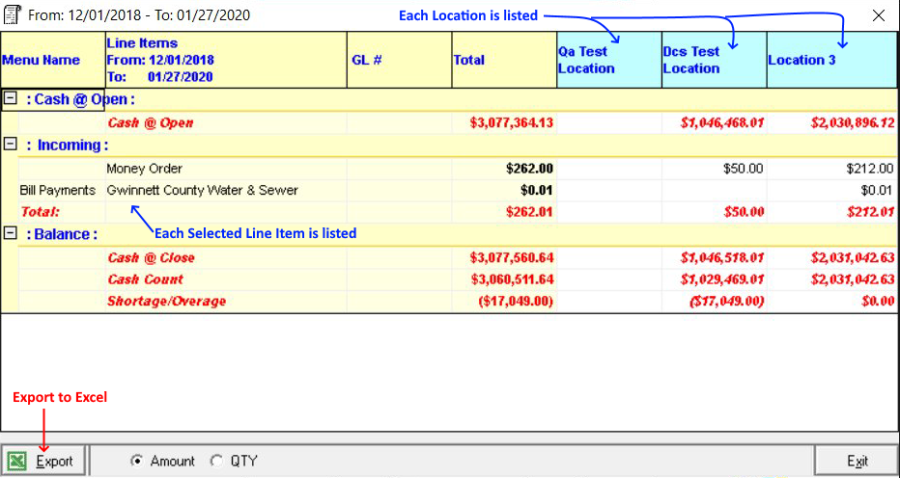
The information will be displayed in a grid format. Each location will be listed side by side with the line items on the LEFT along with the sub-menu names for sorting.
The data can be exported to Excel on the bottom left.
Spreadsheet
This is the original accounting report showing line item totals for locations and date ranges. It is a Report format and can be printed to a report printer. It is also available in a Grid format that is similar to excel if you prefer that.
To view, go to Reports > Spreadsheet.
Select the location(s).
Choose which line items you would like to include in the report. Click Enter to continue.
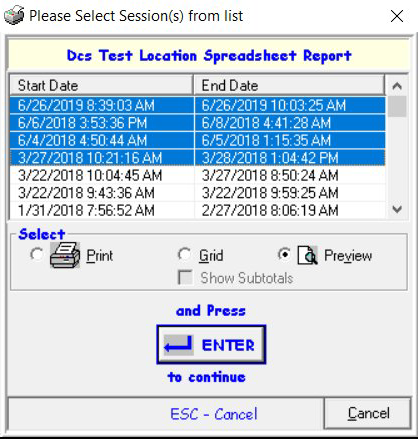
Select a date or date range. The Preview setting will display the report format. Grid is for the excel formatted version. Click Enter to continue.
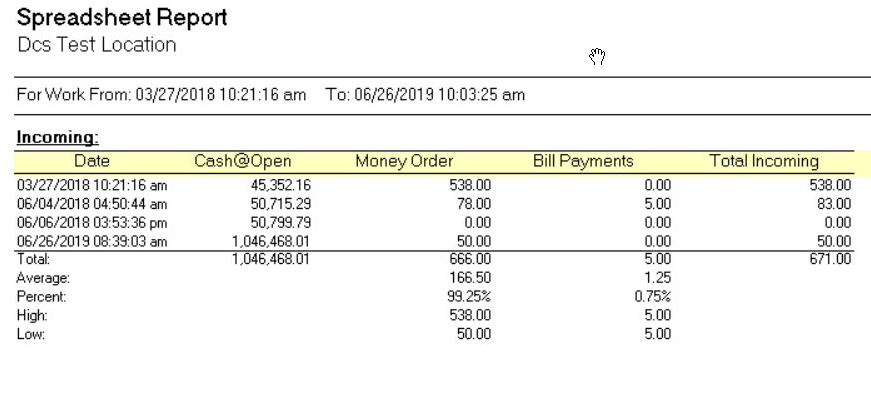
The spreadsheet report will be displayed.
Line Items / By Transaction Detail Report
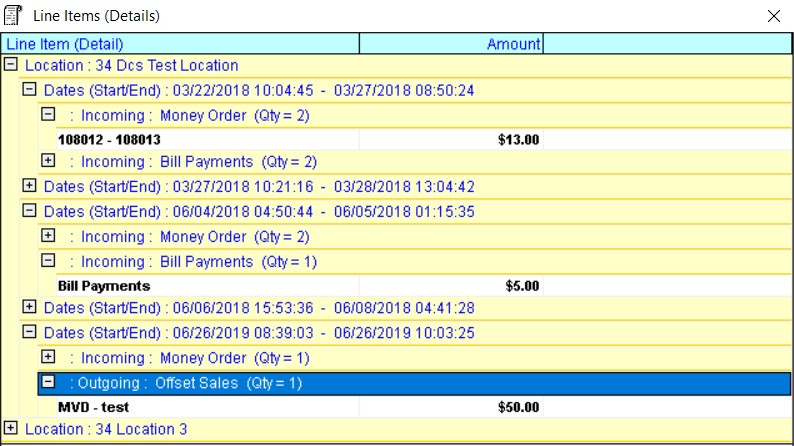
If there are line items that contain comments entered by the user at the locations, you can view those comments in this Line Items report.
Select Reports > Line Items by Transaction Details.
Select a location(s). Click continue.
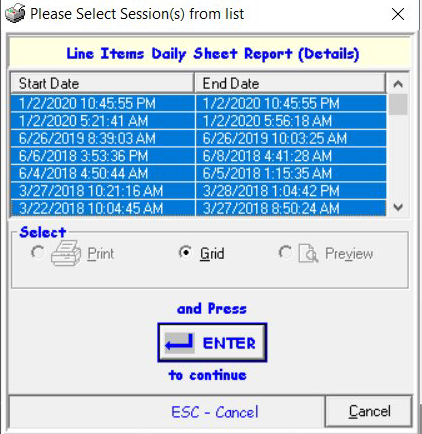
Select a date range and click Enter.
The data will be displayed an Grid format. The Comments will be in Bold Text for each line item that contains Comments.
You can also export the data and choose how you want to group it all.
Check 21 Reconciliation Report
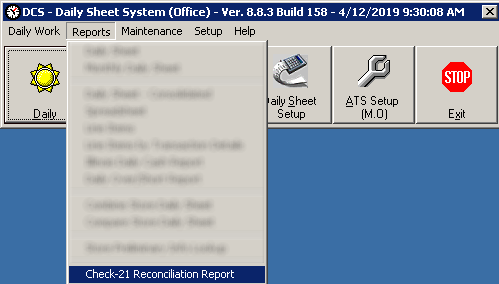
The Check Deposits can be reconciled using DCS main office software. In the Daily Sheet program, navigate to the 'Reports' drop down and select 'Check21 Reconciliation Report'.
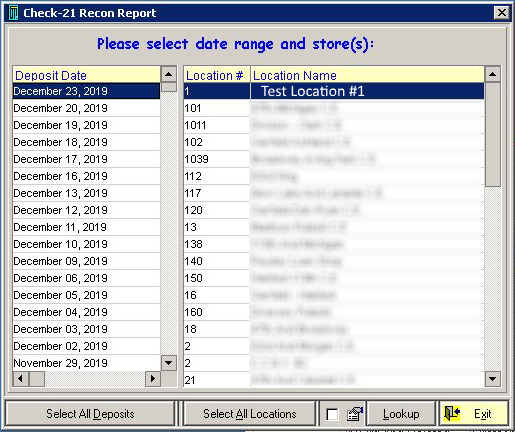
This report will group the check cashing activity into the Deposit dates. These Deposit dates will match up to your bank statements they are posted to. You can also select 1 or all locations to reconcile the data for. Click "Lookup' when you have what you want selected.
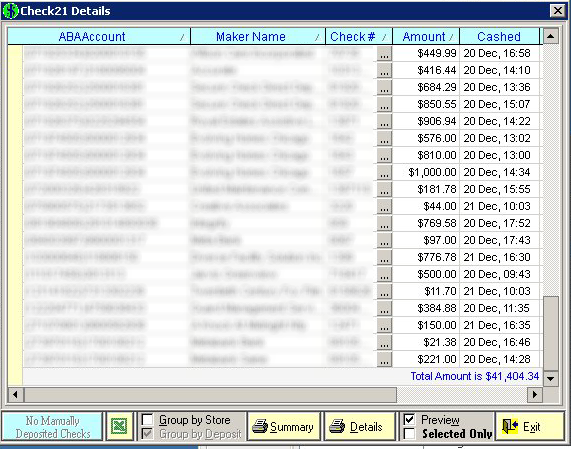
The details will be displayed. You can group the deposits by store by checking the box on the bottom. The totals will be displayed at the bottom as well.
This report also allows you to look for any 'Manually Deposited' items. These will help you identify items that did not transmit and may need attention.
Any Manual Deposits will be displayed with the turquoise color and red text.
These reports can also be exported to excel for further manipulation.
Return to Top
ATS Setup (Modifying Transaction Menus)
ATS Setup is used to Setup and Configure the ATS Transaction Menu. You can edit fees, add new transactions or rename and move transactions.
Select Teller Menu or Vault menu. Teller Menu is for the ATS Transaction Menu.
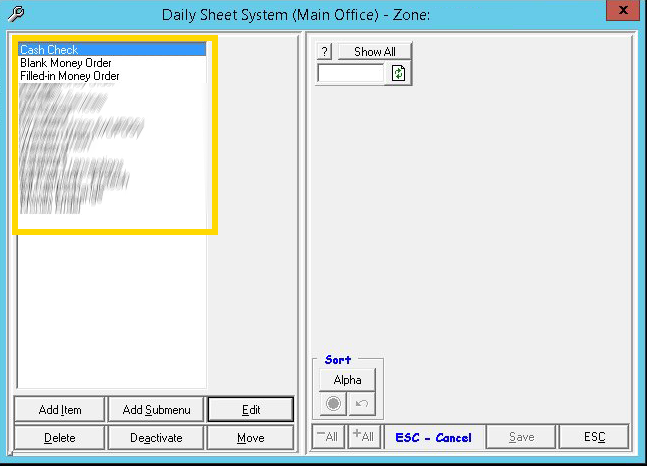
A standard Teller Menu is displayed below. The highlighted area will be the list of transactions currently setup for the selected zone.
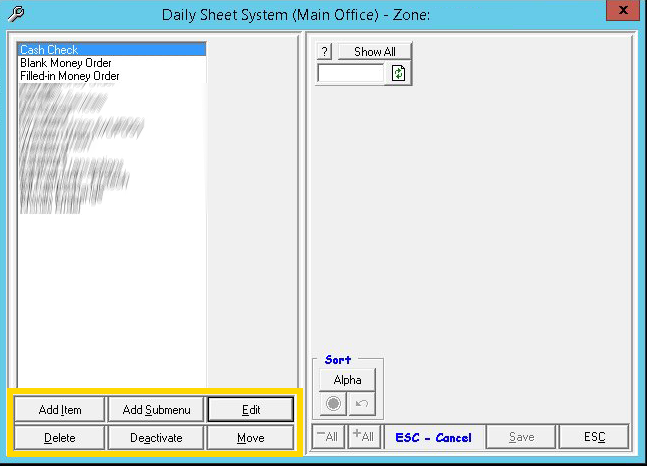
At the bottom of the Teller Menu screen are the options available to modify this list.
- Add item: Use this to add a new custom transaction directly to the main list of transactions displayed
- Add Sub-menu: Use this to create a new group or category of transactions
- Edit: Use this to edit a selected transaction
- Delete: Deleted any unused transactions Note that any older items that contain history cannot be deleted
- Deactivate: Use this to remove a menu item from future exports
- Move: Use this to change the display order of all transactions
Adding a New Transaction
Step 1
Click 'Add Item' on the bottom left.
Step 2
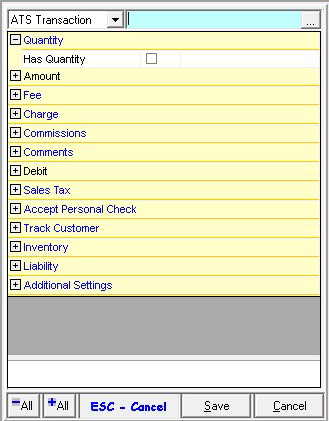
The screen below will appear on the right panel. Start by typing the Transaction Name in top right section.
Before you get started checking the next boxes, make sure you understand how each section works here.
Step 3
Configure the transaction as needed. If you need help determining what boxes to check, review the article here.
Step 4
Click 'Save'
Step 5
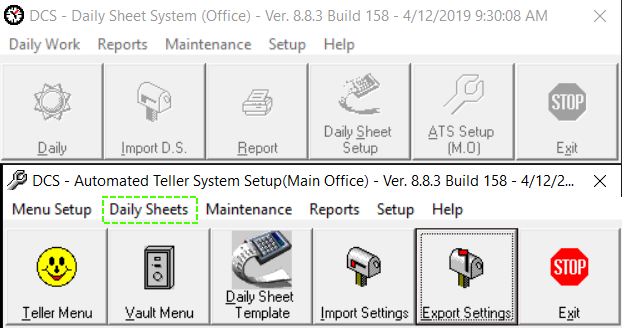
In the Daily Sheet ATS Setup screen, the new items need to be added to the Daily sheet templates.
Click the word 'Daily Sheets' above the vault menu button.
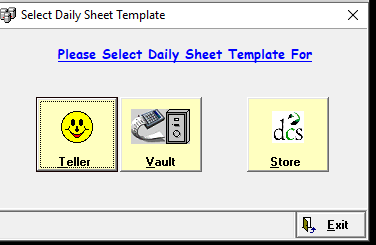
A list of your locations will be displayed. Click OK.
Now you will select 1 by 1 each of the templates below.
For each one, click the Auto Generate new items button in the screen that appears and then click OK to save.
Remember to do this process for each teller / vault and Store templates.
Now you need to setup a LINK to the Main Office. Steps below.
Return to Top
Main Office Links (Create and Set)
Each line item in the MAIN OFFICE Daily Sheet program needs to have a LINK to the STORE Daily Sheets. This is how we display the store totals in the Daily Sheet Program.
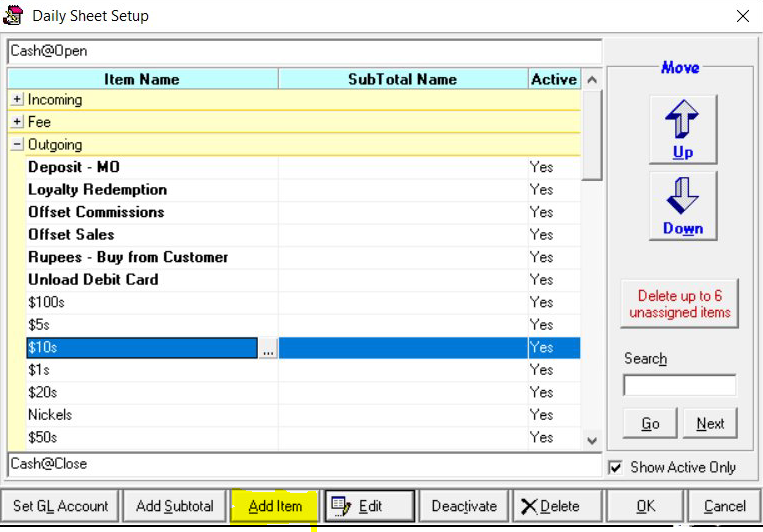
Create a New main office link by Selecting Setup > Daily Sheet.
The Daily Sheet Template will be displayed. Each of these line items is a LINK. Each of them can be set within the Store Daily Sheet Template. This Template is broken up into the 3 Sections: Incoming - Fee - Incoming.
Click Add Item.
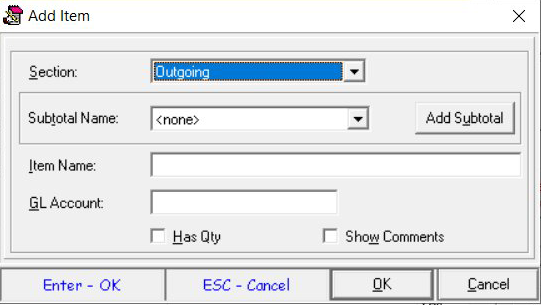
Choose the section that this link is for. You can make it part of an existing subtotal if needed.
Type a Name for the link and click OK. The item will be created and you will see it on the template.
You can now Exit the Daily Sheet Setup by clicking OK.
Now you are ready to assign the NEW LINK that you just created to the transaction you just created.
Click ATS Setup.
Click 'Daily Sheets'.
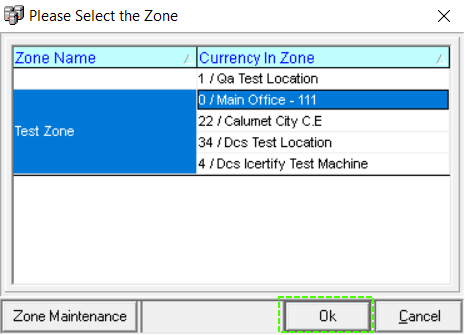
Click OK on the zone listing. Select STORE.
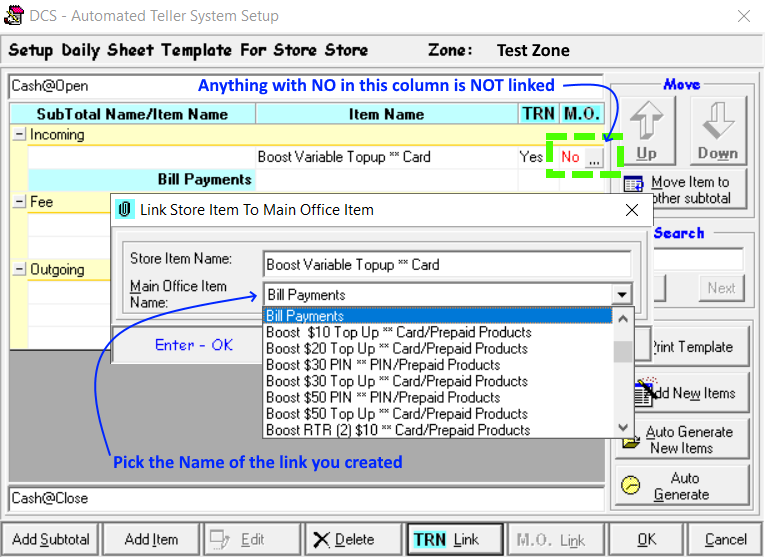
The store template will be displayed. The M.O. column will show you any transactions that DO NOT have a LINK setup. These need to be set before you export the updates to the stores to ensure the sheets are uploaded each day.
Select the transaction you want to set a LINK for and click the small grey icon with 3 dots.
Use the drop down to select the main office link you just created for the transaction and click OK to save.
Return to Top
How to Export changes to stores
Any changes that you make to the transaction menus or main office links need to be exported to the stores. The changes will take effect during the next closeout at the store.
Click ATS Setup.
Click Export Settings.
Select the Zone and Click OK.
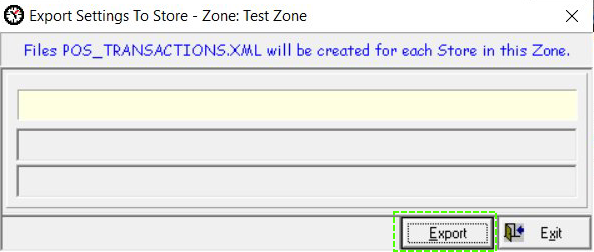
Click Export.
The system will generate all the files needed for each of the locations.
Return to Top
Fee Exceptions
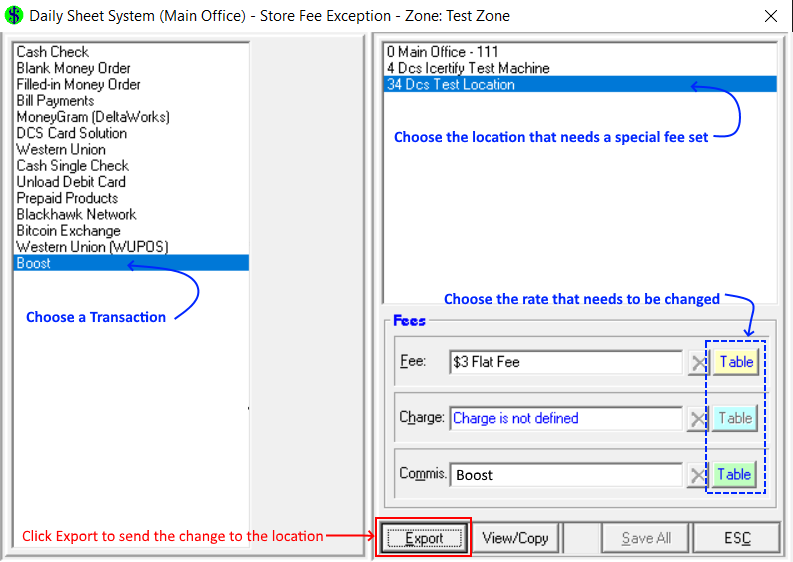
If you need to set a specific fee for a location differently from all the rest, you can setup a Fee Exception. You can setup exceptions for any transaction or location.
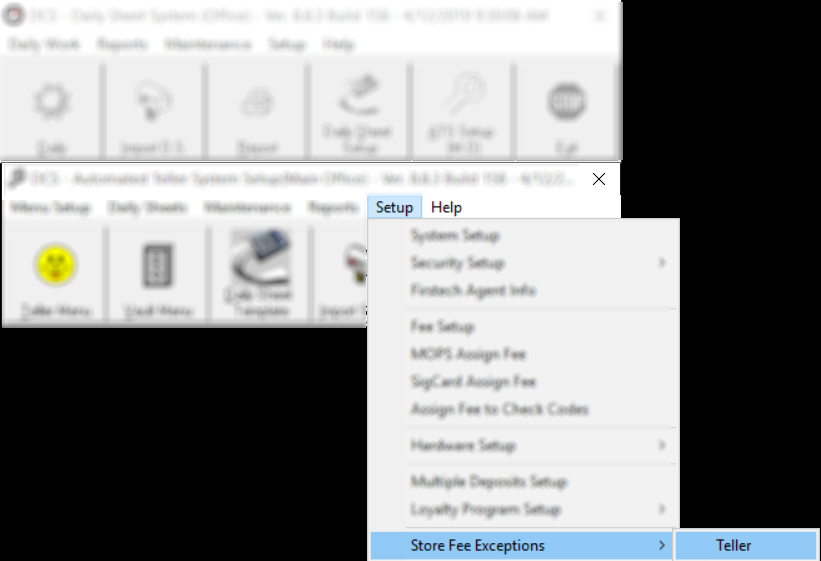
To configure a fee exception, go to Setup > Store Fee Exception > Teller.
Click OK to select the zone.
On the LEFT, choose a transaction to setup a fee exception for.
On the Top Right, choose the location.
On the Bottom Right, change the fee(s) as needed.
Be sure to export any changes by selecting the location and clicking Export.
Return to Top

