Bank Reconciliation - Getting Started
Article Summary:
What is DCS Bank Reconciliation?
It's a custom built program used to quickly compare your bank statement ACH activity versus the transactions that took place at the store level. Most companies have a handful of vendors that take money out of their business accounts each day. These same vendors make mistakes and this program can process your bank statements, via a standard .CSV file, and check to see if the transactions at the store add up to the ACH amount that they took out.
Organizations spend a lot of man power checking reports and comparing these numbers daily, weekly, or monthly. This program will reduce the number of items that require someone's attention by displaying Exceptions. Exceptions occur when an ACH amount DOES NOT match up to the transactions that took place for that business day. Instead of checking each an every ACH to make sure they match, we let you know what matched and what didn't so you can focus on what matters.
How does Bank Reconciliation work?
We customize the program to work for your business needs. We need a handful of things to start the customization. Overall, the process break down is this:
Choose a file to process. This is an exported .CSV file from your bank website.
The program will review the file and tell you how many things it can try to reconcile for you.
The program connects to each store and pulls transaction totals. This is a background process and does not impact the store in any way.
The program compares the store transaction totals to the file you selected for processing.
The program tells you what matched and what didn't.
What do I need to get started using it?
1. Bank File Export - .CSV Format
The DCS Recon. Program is very flexible and can accept most standard bank files. The files must be in the correct format and contain key identifiers in order to work properly though. It is best to send a file example to DCS so we can review it before you start using the system.
The bank files will be obtained by you and your staff from your banking website. Generally speaking, all bank websites allow you to export your bank account activity for date ranges to multiple file formats. This will need to be done each time you want to run a file through the DCS Recon. Program.
Example File Layout below. Each of the columns below are required, per location, in order to use the recon program.
TRC Number | Account Number or Location ID | Account Type | Account Name | Post Date | Reference | Amount | Description | Type | Text |
71001180 | 123456789 | Checking | Demo Test Account | 5/1/2019 | Green Dot Bank eP | ($3,659.50) | PREAUTHORIZED ACH DEBIT | Ach | Green Dot Bank ePay CCXXX |
71001180 | 123456789 | Checking | Demo Test Account | 5/1/2019 | COMED PA | ($2,549.29) | PREAUTHORIZED ACH DEBIT | Ach | COMED PAYMENTS 190501 #1001-A |
71001180 | 123456789 | Checking | Demo Test Account | 5/1/2019 | COMED PA | ($2,298.02) | PREAUTHORIZED ACH DEBIT | Ach | COMED PAYMENTS 190501 #1001-B |
71001180 | 123456789 | Checking | Demo Test Account | 5/1/2019 | DCS CONVENIENCE PY | ($2,011.70) | PREAUTHORIZED ACH DEBIT | Ach | DCS CONVENIENCE PYMNTS 190501 #1001-A |
71001180 | 123497800 | Checking | Demo Test Account | 5/1/2019 | ELS CT | ($1,634.97) | PREAUTHORIZED ACH DEBIT | Ach | ELS CTYD042919 ELS CITY FEES 2019-04-29 CX00123 |
71001180 | 123497800 | Checking | Demo Test Account | 5/1/2019 | PEOPLES GAS CX | ($1,580.26) | PREAUTHORIZED ACH DEBIT | Ach | PEOPLES GAS CX 190501 #1001-A |
71001180 | 123456789 | Checking | Demo Test Account | 5/1/2019 | ELS ST | ($1,245.00) | PREAUTHORIZED ACH DEBIT | Ach | ELS STD042919 ELS GOV FEES 2019-04-29 CX00123 |
71001180 | 123456789 | Checking | Demo Test Account | 5/1/2019 | PEOPLES GAS CX | ($1,079.70) | PREAUTHORIZED ACH DEBIT | Ach | PEOPLES GAS CX 190123 #1001-B |
2. Account Number information for each location OR Location Identifier
The DCS Recon. Program needs the account numbers for each of your locations so we can distinguish where each transaction took place. If you only have 1 account for all of your stores, you need some type of identifier per location to use the Bank Recon. program.
3. List of Vendors to Reconcile
Each vendor you are looking to reconcile will need to be setup in the DCS Recon. Program.
4. ACH Schedules for the Vendors - Cutoff times per Vendor
The ACH Schedule for each vendor can usually be obtained by contacting your vendor directly. They can provide the business day cutoff time and let you know when they ACH for each of your business days.
5. Bank Description for each Vendor (memo/description text)
When you export a bank file, there is a column that contains text that describes what the transaction was for. This is usually standardized and the same for each ACH from that vendor. The DCS Bank Recon. Program will need that text so we know which vendor each ACH belongs to. Example above in the last column.
Can I Reconcile any Vendor?
The Bank Recon Program works best with vendors that have regular ACH Schedules. If a Vendor does not have a set schedule, we can still process the data for you. You can adjust the schedule manually to get numbers to match up. Any vendor without a set schedule will likely cause many exceptions by default and this is to be expected since you need to change the schedules manually.
Setup
The information below is for setting up all the different features in the DCS Bank Recon. Program. As you start using the system you will want to add new vendors or maybe change banks and those types of things require someone to make changes to the Bank Recon. settings in order for things to keep working.
Setup a Bank File
As mentioned above, you need a file from your bank that contains Account Numbers/Location IDs and account activity. You can contact your Bank Representative for help on exporting this data from your online portal. The standard format is .CSV which all major banks support.
Once you have a file, we are ready to tell the Recon Program how to read this file.
Login to the Daily Sheet program.
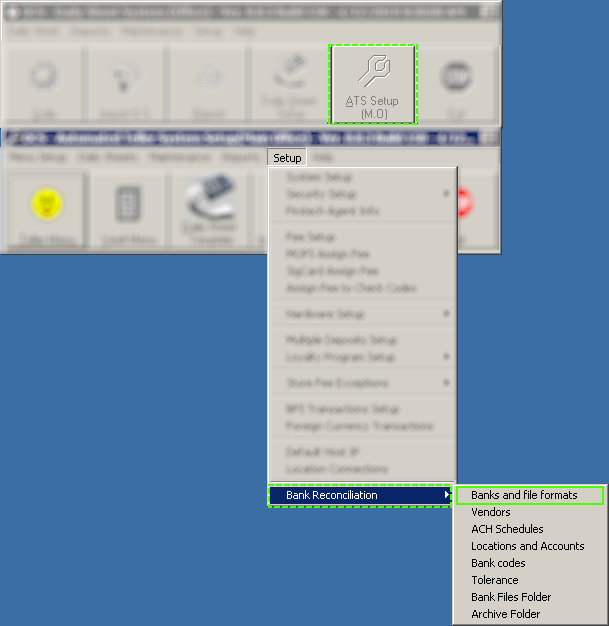
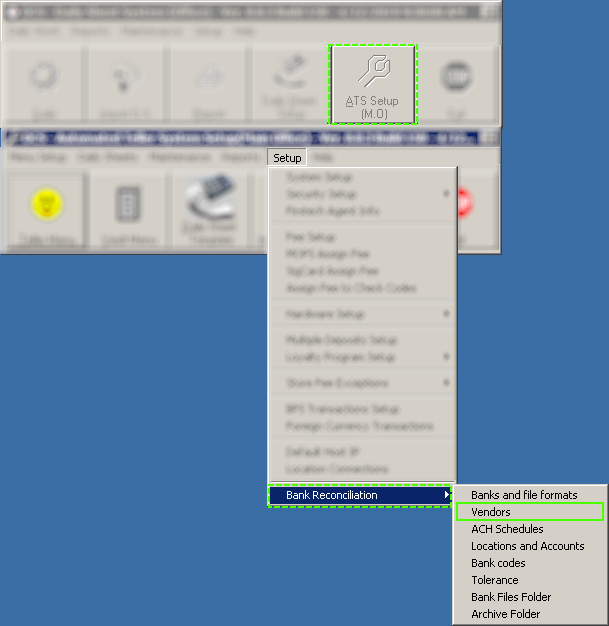
Click ATS Setup and look for Setup > Bank Reconciliation > Banks and File Formats. Select it.
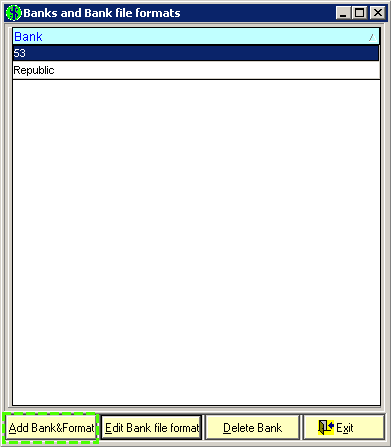
A new screen appears. It will contain any existing banks which can be modified OR you can ADD a new Bank and file format. Click Add Ban&Format.
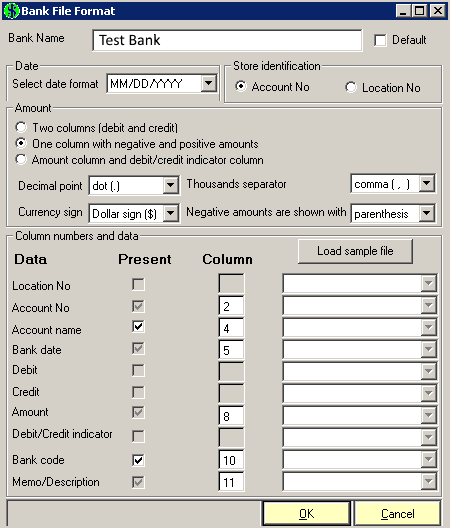
The setup screen will appear. It looks like a lot to take in but it’s not that complicated once you look at what the system is asking you for.
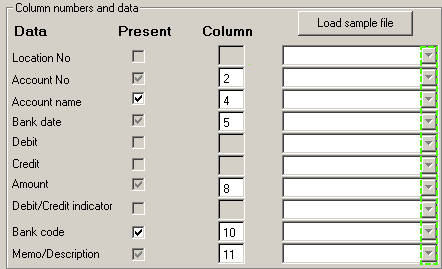
Click below to view detailed information for each section of the bank file page.
Now the Recon Program knows how to read each of the columns in the file you will provide each time you use the system.
Be sure to always use the same format from the bank. If a file doesn’t match this exact format, the system won’t know what to do with it.
How to Setup a Vendor
A vendor can be any company/service that regularly ACH’s your accounts for the services provided. Anytime you add a new vendor, you can add them to the Recon Program for processing. The steps below will show you the basics on adding a new vendor.
Login to the Daily Sheet Program.
Click ATS Setup and look for Setup > Bank Reconciliation > Vendors. Select it.
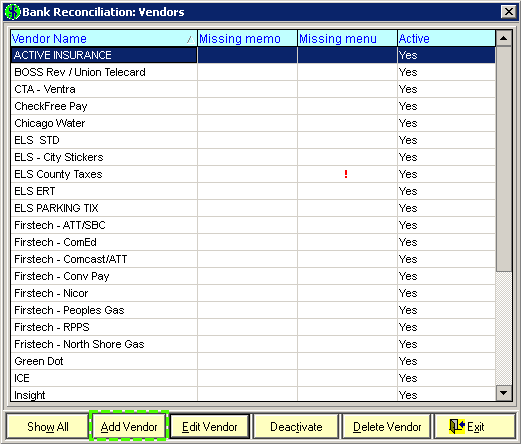
A new page will appear with all the current vendors listed. You can edit any of them from here OR you can add new vendors. Click Add Vendor.
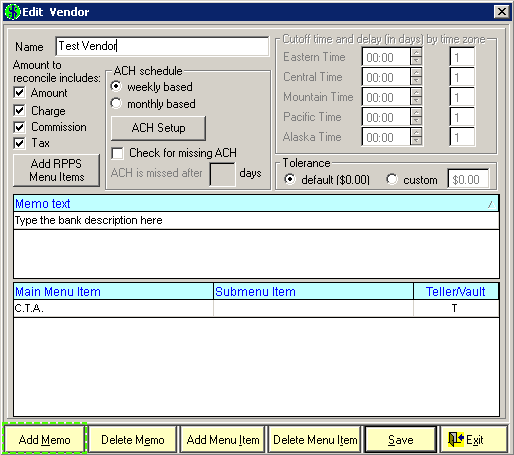
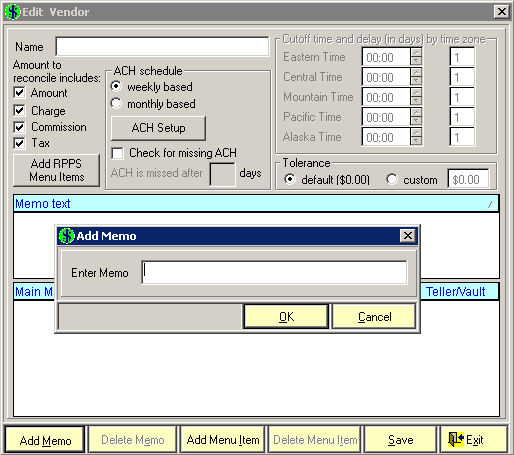
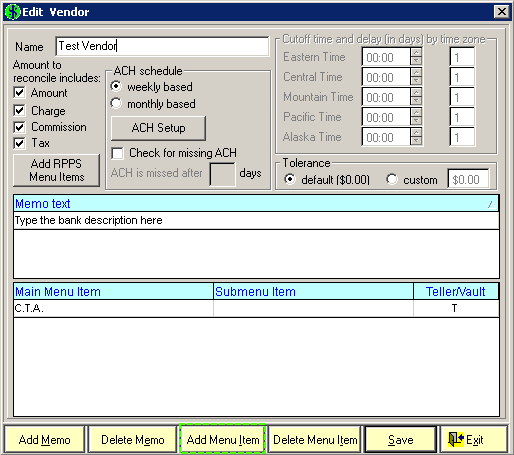
Type the name of the vendor at the top and then click Add Memo.
In this example the vendor name is in the ‘text’ column.
Text |
Green Dot Bank ePay CC1234 |
Using the example above, you should type: Green Dot Bank ePay
We left out the CC1234 because that part is specifically for a location and we won’t want to add a separate memo for each store. By using only the 1st part of the text, we can setup a more generic way to match up the vendor for all locations.
Now we need to tell the Recon Program which transactions belong to this vendor. Click Add Menu Item.
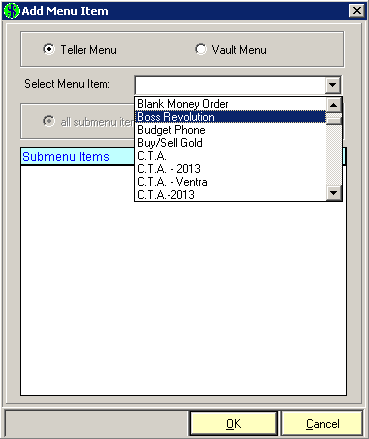
A new window appears. At the top of the screen, select if you want to choose a transaction from the ATS Teller menu or the Vault menu. Most will be Teller Menu.
The drop down allows you to select which transactions should be assigned to this vendor. Click OK once you have the transaction(s) selected.
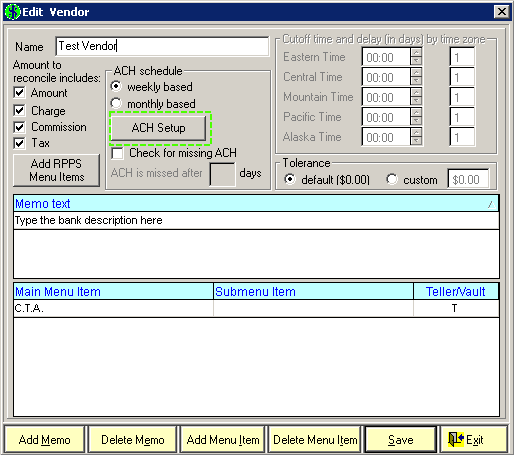
Back on the vendor menu, click ACH Setup.
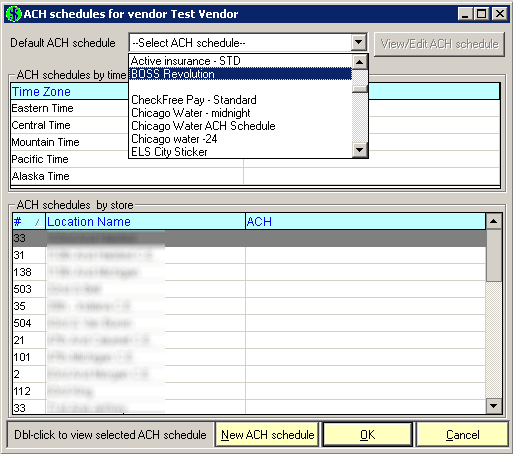
An ACH schedule needs to be selected for the vendor. The next section explains how to create schedules. For now, you can choose an existing schedule until you create one specifically for this vendor.
If you do not set a default ACH schedule, the system will not process the vendor for Reconciliation.
Setup an ACH Schedule
ACH schedules tell the Bank Recon Program when the transactions took place for each vendor. The steps below show you how to quickly add a new ACH schedule.
Login to the Daily Sheet Program.
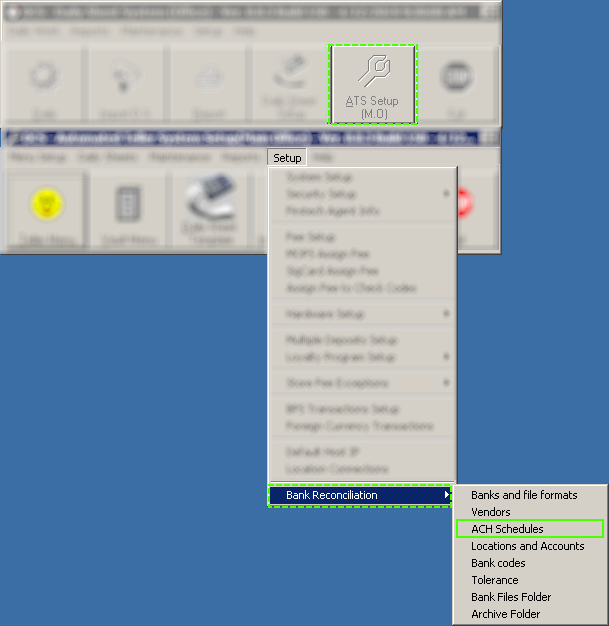
Click ATS Setup and navigate to Setup > Bank Reconciliation > ACH Schedules
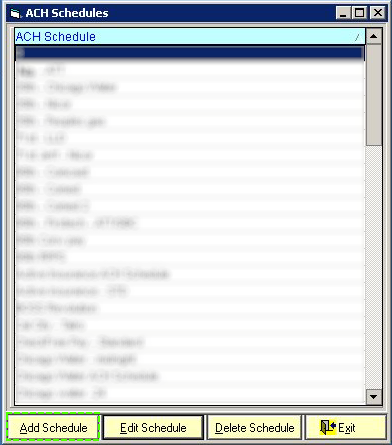
Click Add Schedule.
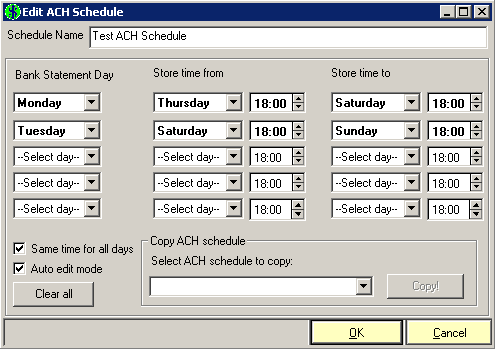
Give this new schedule a name. Next we need to tell the Recon Program when the bank takes money from your bank account.
Bank Statement Day: Pick which day of the week the ACH for this vendor appears on your bank statement. Since bank transactions only happen Monday - Friday, you can only select those weekdays.
Example: If you see an ACH from a vendor every Monday- Wednesday-Friday, You will only use 3 drop downs on the left. Pick Monday at the top, then Wednesday under that, and finally Friday.
Store Time From: and Store Time To:
This section tells the Bank Recon Program what business day relates to the ACH for that weekday. So the ACH for Monday in the example below is for the transactions that took place between Thursday and Saturday. The TIME is the business day cutoff time for the vendor. It is in Military time, you can use online calculators for conversion if needed.
Setup Account Numbers
Account numbers are the primary identifiers for each location. If you are using Locations numbers instead of account numbers, you still need to add the locations here but you do not need to add accounts.
Login to the Daily Sheet Program.
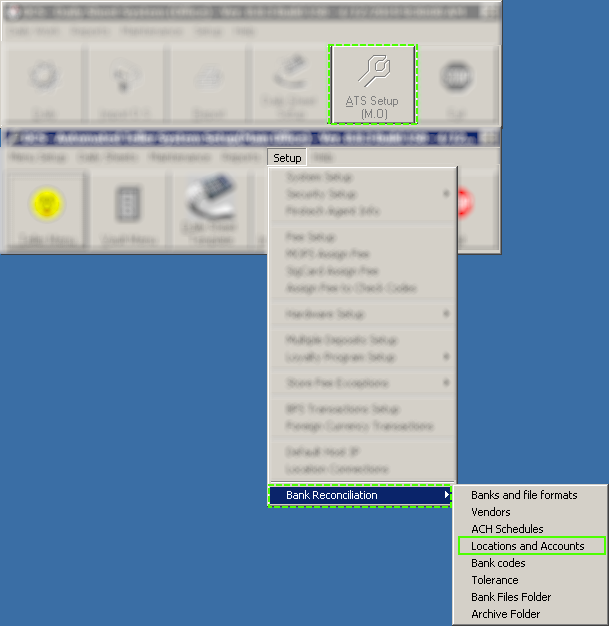
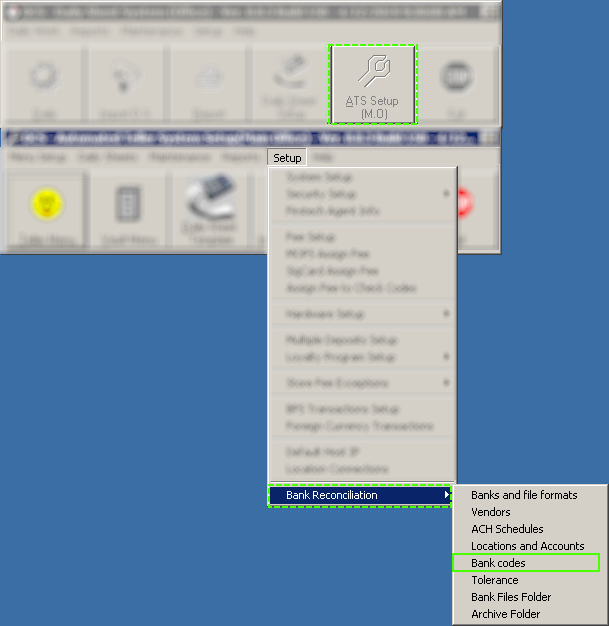
Navigate to ATS Setup > Bank Reconciliation > Locations and Accounts. Select it.
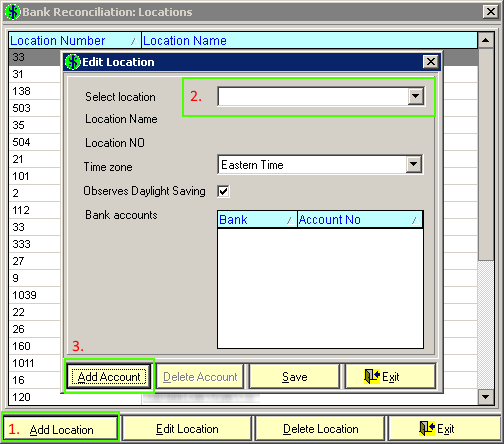
Click Add location on the main screen and a new window will open. Select the location from the drop down and then click Add Account. Again, if you are using location numbers for the identifier, you can skip the add account and just click Save.
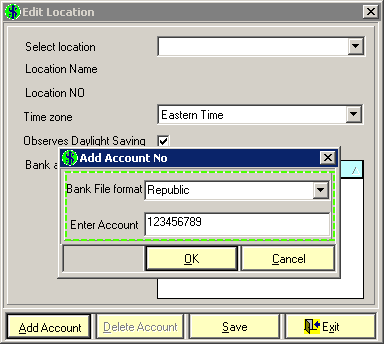
When you Click Add account, the form below will appear. Select the Bank on the 1st drop down and then type in the account number. Click OK to save.
Setup Bank Codes
Bank Codes are identifiers for the bank transactions. Banks use numbers or text to identify an ACH or Credit transactions. These usually don’t change so the initial setup DCS does will include that is needed. If you ever need to try and reconcile a new code or you change banks, you will need to update this section.
Login to the Daily Sheet Program.
Navigate to ATS Setup > Bank Reconciliation > Bank Codes. Select it.
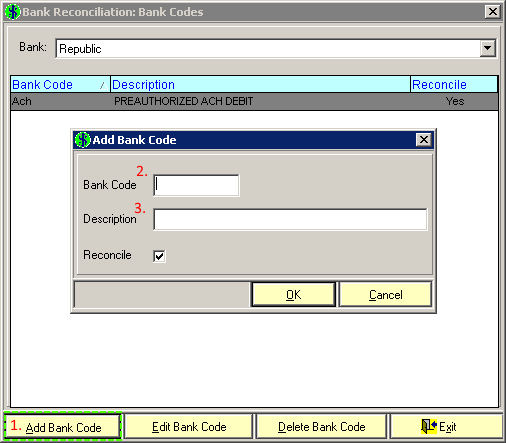
Click Add Bank Code. The pop up window will appear so you can type the Bank Code and a description for the code. Click OK to Save.
How to process a Bank Recon File
Once the initial setup is complete, you’re ready to start processing files through the DCS Bank Recon Program.
Double Click the Bank Recon icon on your desktop.
Type your password. Use UPPER CASE for all users.
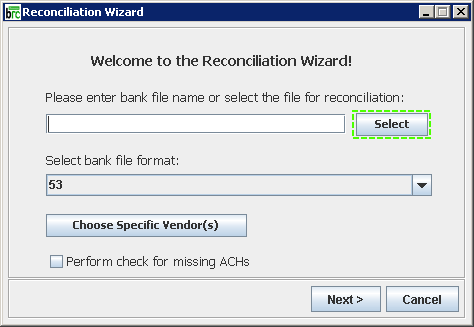
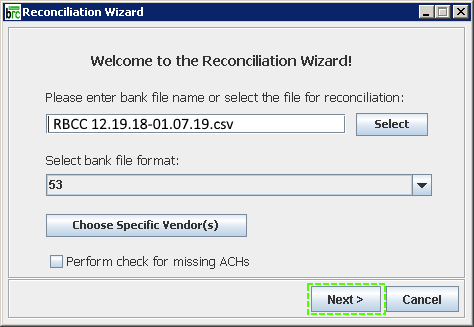
Now it’s time to select a file to process. Click Select.
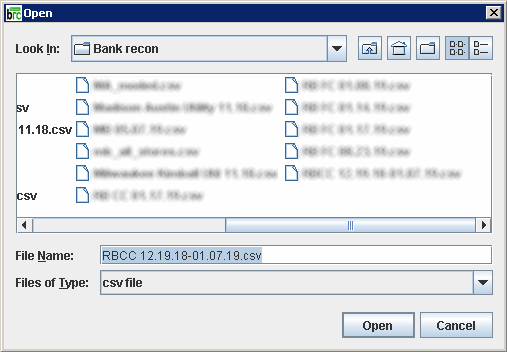
A new window will appear. You can navigate to where you saved the file to process. Select it and click Open.
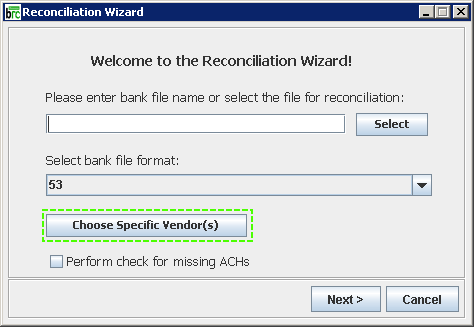
You can select which vendors to process by selecting ‘Choose Specific Vendors’. If you want to reconcile all vendors just click Next.
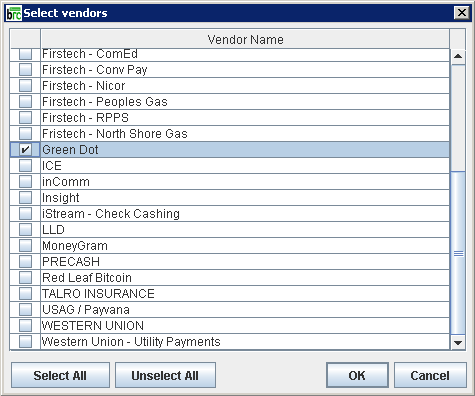
The list of available vendors will be displayed. Check the box for the vendors you want to process. By default the system will process ALL vendors unless you specify a vendor(s). Click OK when done.
Click Next to Start.
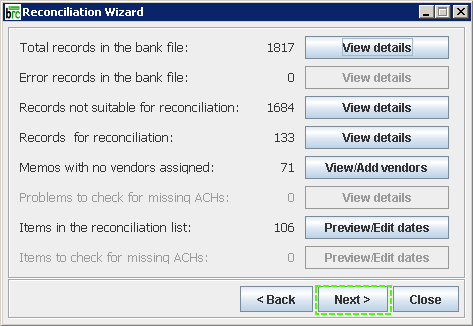
The system will read the file and display the count of items to be reconciled. Click Next to process the file.
The system will display a status bar for connecting to the stores and display the final results.
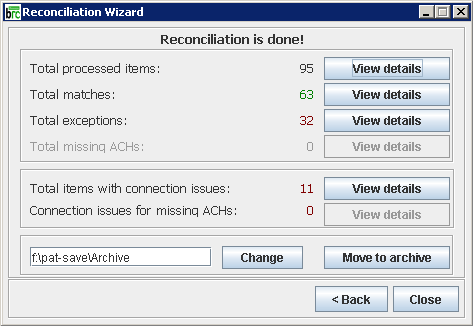
In the example below we can see:
95 line items were processed. 63 of them were matches. 32 were exceptions, this means the ACH did NOT match the store transaction totals. Lastly, it shows 11 lines had issues connecting to the location. This happens if the internet is down at the location. Click View Details next to each section that you want to view.
Below is the view of all line items. It will include matches and exceptions on the same page. Double click any line item and the details will be displayed.
The details page displays the list of ACH(s) for that line and the associated transactions. The exact time the transaction was recorded at the store is displayed along with any comments if applicable to the transaction. You can export the data to excel and use the Calc total button to add up specific transactions if needed. Click Close to go back to the summary screen.
At the bottom of the summary page, you have the ability to SAVE ALL results for future reporting.
The ‘Calc totals’ button on the summary page will also allow you to add up any number of lines and show you the overall difference.
You can process as many files as you need but the results are not saved unless you click ‘SAVE ALL’ OR ‘SAVE SELECTED’. You can also overwrite existing results.
Reports
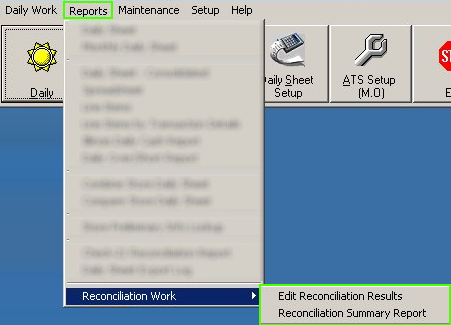
The results of each file you process can be saved for future editing and reporting. In the Daily Sheet Program, you can navigate to Reports > Reconciliation Work >
Here you can select from the 2 reports below.
Edit Recon Results - allows you to go back and mark an ACH as matched or add notes.
Summary Report - Report version of the results along with vendor names and totals.
Edit Recon Results
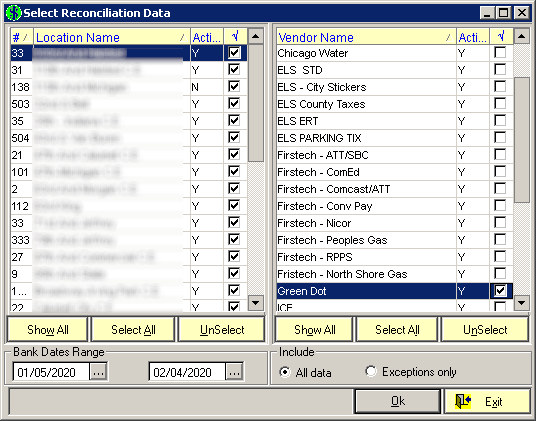
When you select Edit Reconciliation Results, the screen below will appear.
Select the location(s) on the left that you want to EDIT results for.
Select which vendors on the right.
Select the Bank Date Range for files you have processed.
Choose All Data or exceptions only.
Click OK to display the results.
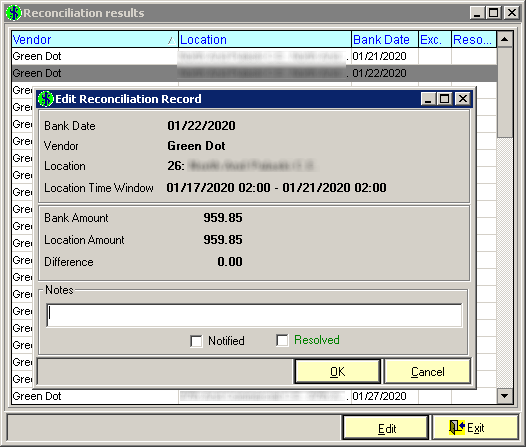
The list of vendors and locations will be displayed. Double Click any line item and the EDIT screen will appear. You can mark an item as Notified. Notified means you notified the vendor about the error. You can also come back and mark it as Resolved. This would happen a few days after the vendor investigates the issue or you determine the issue yourself. You can also type notes for the issue if needed. These results are displayed on the summary report which we will review next. Click OK to save any changes.
Reconcile Summary Report
The Summary Report displays all the results from the DCS Bank Recon processing in a report format. This is strictly for reporting purposes. The Summary Report is actively updated based on any changes you make to the results.
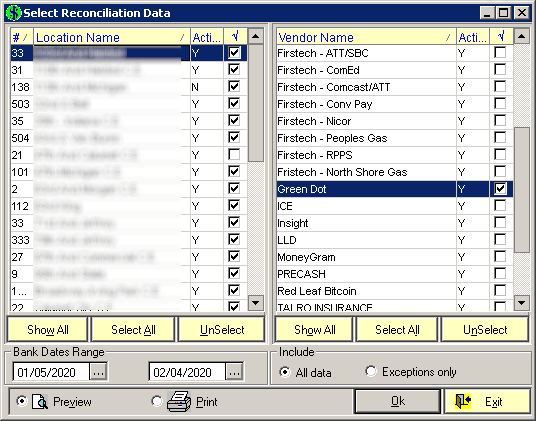
To run a report,
Select the locations on the left that you want to VIEW results for.
Select which vendors on the right.
Select the Bank Date Range for files you have processed.
Choose All Data or exceptions only.
Click OK to display the results.
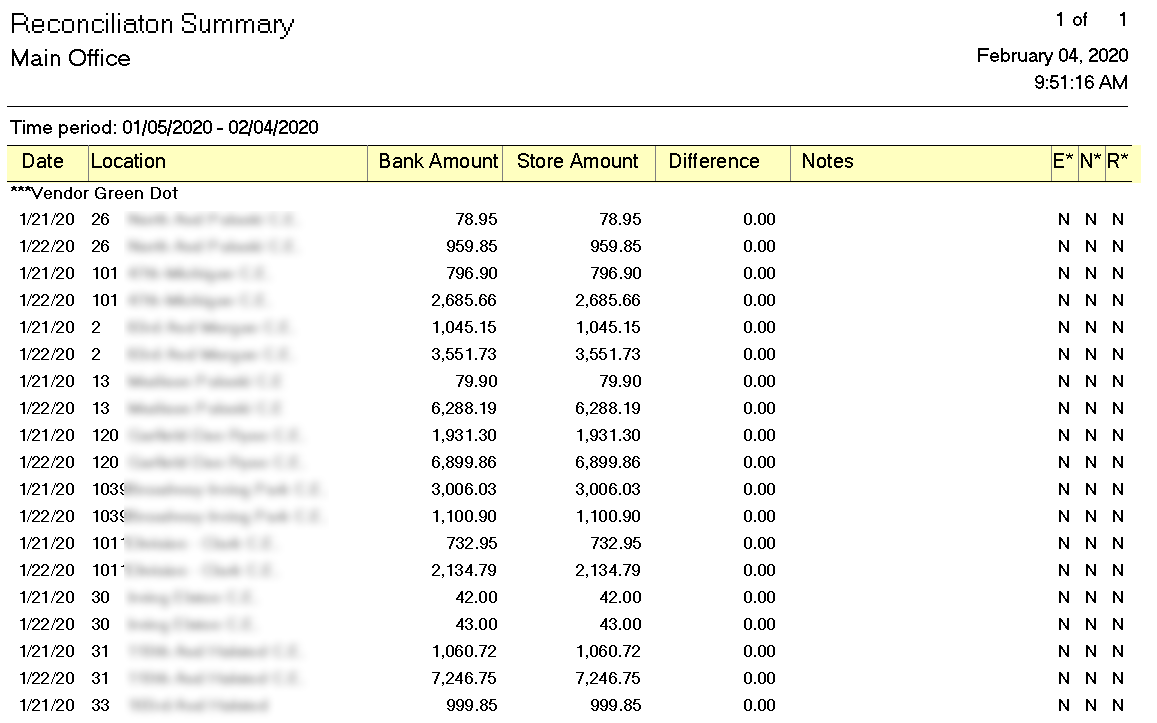
The results will be displayed in a report format along with the Bank Amount / Store Amount and the difference between the 2 numbers. You can also see any notes and quick abbreviations for Exceptions (E), Notified (N), and Resolved (R). These reports can be printed to a report printer as needed or saved to PDF to be emailed.
Each page will contain information on each vendor. Close the report when done.

